Mushroom Jerky

On a recent visit to our local Heinen’s grocery store I noticed a profusion of choices in mushroom jerky. They had a brand featured on Shark Tank (Pan’s Mushroom Jerky), so I bought a package of their original recipe and passed it around at a mini-foray. It got favorable reviews, so I decided to try my hand at making my own. I know the carnivores in the group are saying really; why waste your time? This is a mushroom blog, after all, so why not? There are any number of websites with jerky marinades and recipes and they all share a common theme of including fat, acid, salt, heat and sugar. I picked this marinade mainly because I had the ingredients on hand and it’s a similar marinade to one I use for a salmon poke bowl recipe.

8 oz fresh mushrooms
1/4 cup low sodium soy sauce
2 teaspoons rice vinegar
1/2 tablespoon chili garlic paste
1 tablespoon sesame oil
1 tablespoon brown sugar
1/4 teaspoon smoke paprika
1/4 teaspoon freshly ground black pepper
1/4 teaspoon garlic powder
1/4 teaspoon onion powder

Ingredients (Brown sugar not shown)

My local farmers market sells an Oyster mushroom medley (8 oz for $7), so I used them and tore them into pieces for the marinade. I initially tried slicing them, but it was less work to just tear them. I didn’t need to brush dirt off the mushrooms since they were already pristine from the grower. I kept the pieces fairly large as they will shrink somewhat after they are dehydrated. I soaked the mushrooms in the marinade overnight and almost all of it was absorbed into the mushrooms.

Marinade & Sliced/Torn Mushrooms
Marinate Mushrooms Overnight

I spread the mushrooms evenly on a couple of dehydrator trays using parchment paper underneath and set the dryer for 140F. After 2 hours, I turned over each piece and waited another 2 hours. The result was semi-moist and chewy. You can go longer if you want a drier result, but this is a good starting point.

Mushrooms Ready to Dehydrate
Finished Jerky

The jerky was very tasty and the texture was surprisingly good considering that a cooked oyster mushroom is slimy and flaccid. There was a nice balance of heat and sweet, but the marinade I chose was too salty and overpowering (there is a 1/4 cup of soy concentrated into a few ounces of dried mushrooms). This is similar to beef jerky products I’ve tried in the distant past and it would be fair to say (in this case) that the mushrooms were a convenient fiber delivery system for the marinade. I definitely want to try this again, but I will try marinades that showcase more of the umami flavor of the mushroom itself rather than rely on the marinade to carry the flavor.

Have you have ever made mushroom jerky? Feel free to share your experiences and recipes with us. – Jerry

A Spoonful of Umami

contributed by Lonelle Yoder

It’s shaping up to be a fantastic July for mushrooming, with rain, rain, and more rain. I hope many of you are finding basketfuls of chantarelles, chickens of the woods, and other delicious things. I, sadly (or not?), have had all my free time commandeered by the baby opossums, bluebirds and robins I’ve been fostering for the Ohio Wildlife Hospital, with little time left for me to make it out into the woods, so my mushrooming has been limited of late. Happily, though, I’ve found a great way to preserve and enjoy the flavors of mushrooms harvested in times of plenty, which allows me to enjoy them during dry spells: mushroom seasoning powder. If you’ve got more than you can eat right now, consider making this umami-packed powder, which has the added benefit of taking up very little space in your cupboard. This is also a great way to use the non-tender parts of mushrooms like chicken of the woods, which don’t make for good fresh eating. 

SHROOMAMI SEASONING POWDER 

It’s important to cook your mushrooms first, even though you will ultimately dehydrate them, since wild mushrooms should nearly always be cooked before consuming. So once you’ve cleaned them, roughly chop them, toss them with a little (not too much!) oil, and spread them on a baking tray. Roast at 400 or 425 F for 25-35 minutes, until the edges are browned. 

Roasting time will depend on the type of mushroom. For mushrooms that are on the tough side, like the stem pieces of chicken of the woods, you may want to use a wet cooking method rather than (or in addition to) roasting, as this will tenderize them a bit. Either add some cooking liquid (water, stock, or white wine or sherry) to the roasting pan, or braise them in the liquid on the stovetop for 10-15 minutes. If there is cooking liquid left in the pan after the mushrooms are cooked through, it begs you to make a quick sauce or gravy or add it to another dish! 

When your mushroom pieces are cooked through and lightly browned, chop them into smaller pieces and dry them in a dehydrator or in your oven on the “warm” setting.  

Now it’s time to pull out your kitchen gadgets! A food processor will work in a pinch, but I like to use an electric coffee grinder to get the finest grind possible. Working in small batches, grind the dehydrated mushrooms into a powder. Take care when taking the lid off of your grinding device, since the mushroom powder will be very light and apt to drift up and out of the bowl – give it a few seconds to settle before removing the lid. 

You’ll probably end up with some powder and some larger nubs; gently sifting it through a fine strainer will let you separate out the larger pieces, which you can re-grind or save separately from the powder. 

The mushroom powder can be used as is, but you can boost its flavor power by adding salt, pepper, dried herbs like thyme and sage, or anything else you fancy. Proportion-wise, aim for at least 3 parts mushroom powder to 1 part other seasonings.  

I like to save the larger pieces that I sifted out for adding to risotto, soup, tomato sauce, or anywhere else I’d use fresh mushrooms. The seasoned powder is great for adding to gravies, sauces, and soups, mixing into pasta dough, sprinkling on hamburgers, grilled or roasted vegetables or eggs, or rubbing onto meat roasts and anything else that benefits from an umami boost. I’d love to hear in the comments how you’ve used it!

Now, if you’ll excuse me, I have to go feed some baby robins.

Cooking with Wild Mushrooms

Martha Bishop, OMS Board Member

If you are lucky enough to find wild edible mushrooms this year, you may be looking for a few tips on preparation for the table!

 Of course, if you plan to eat any wild mushrooms, you should always be absolutely certain that you have correct identification, and that the species is listed in modern field guides as edible.    Always check with an experienced identifier if you are unsure about what mushroom you are looking at.  Many wild mushrooms can be confused with poisonous species if you do not have adequate experience with a particular species.  Some species that were previously considered edible are now known to contain dangerous toxins. 

Once you are sure of your ID and edibility, check to make sure that all of the mushrooms in your collection are the same species.  It is possible for species that look similar but are not the same to grow close together.  Also check your field guides to see whether there is any information about not collecting otherwise edible mushrooms from specific locations.  Mushrooms sometimes concentrate toxins from certain trees.  Never eat any mushrooms collected from industrial and agricultural sites or yards where chemicals may have been purposely or accidentally applied to the soil or trees.   Mushrooms have been shown to concentrate radiation, heavy metals, pesticides, and other chemicals.

Next, clean your mushrooms.  I wash them with in water to remove any insects and soil or other debris, and then dry them with a towel to remove excess moisture.   Many people like to soak morels overnight in salt water to remove insects from cavities in the mushrooms.  If any of your mushrooms appear to be discolored or showing other signs of spoiling, throw those away.  Old mushrooms, like any other spoiled food, could cause illness.

Generally, you should always cook wild mushrooms thoroughly before consuming them.  Many mushrooms, including morels, have substances that cause illness if the mushrooms are eaten raw or undercooked.   I usually cut mushrooms into small pieces cook them at least 10 minutes after they are heated through to make sure of thorough cooking.

If you are cooking a mushroom that you haven’t eaten before, eat only a couple of bites on the first day that you try them.  Some people experience personal reactions or allergies to new foods.  You can try eating more the next day if you suffer no ill effects.

I hope you will have success in finding some wild edible mushrooms this season!  Since it is illegal In Ohio to sell wild-collected Ohio mushrooms, this may be your best chance to try eating them.

Please see a couple of my favorite preparation methods below.

Favorite Morels

Morchella esculentoides

Morels can be fried, baked, or steamed and eaten as a side dish or included in other recipes calling for mushrooms.  This is my preferred way to prepare them because the flour helps to retain moisture and to concentrate the delicious flavor.

Ingredients:

  • Morels, precleaned, soaked overnight in salt water, and dried as above (You may want to cut large ones in half, lengthwise.)
  • Extra virgin olive oil, butter, or both
  • Flour

Put a generous amount of flour in a shallow bowl.  Roll the morels in the flour to coat.  Heat enough oil or butter to coat the skillet over medium high heat.  The skillet should be large enough to lay out the morels in a single layer.  Cook until browned on one side, and turn to brown on the other side.  Heat should be high enough to brown the mushrooms, but low enough to allow thorough heating through for several minutes.

Cantharellus lateritius

Brandied Chanterelles

This is a delicious recipe inspired by the combination of Walt’s famous recipe for candied chanterelles and the gift of a bottle of fine Armenian brandy.  You could use any brandy you prefer.  I have used cognac with good results.

Ingredients:

  • Chanterelles, cleaned and dried as above, and sliced
  • Extra virgin olive oil
  • Brandy
  • Wildflower honey (or any kind you have on hand)

On medium high, heat just enough olive oil in a large iron skillet to prevent sticking.  Add the chanterelles in a single layer and sauté until golden on both sides.  Remove from heat and add an ounce or two of brandy depending on how many mushrooms you have.  Be careful because the brandy may flame if you add it over the heat.  Add a little water or more brandy if all the brandy evaporates immediately.  Return to low heat and stir and simmer until the liquid evaporates.  Drizzle the mushrooms lightly with a bit of honey to glaze, and cook, stirring another minute to finish.

Pheasant’s back jerky recipe

Here is a recipe for a common springtime edible mushroom, cerioporus squamosus or the Pheasant’s back, also called Dryad’s saddle. Although easy to identify, it’s not the tastiest of mushrooms…but with enough soy or barbecue sauce it can be pretty good!

Cerioporus squamosus by Walt Sturgeon

Marinade (adjust to your liking)

2 c. red wine vinegar
1/3 c. olive oil
swig of sesame oil
2/3 c. tamari (soy sauce)
2-3 cloves garlic, crushed
Optional liquid smoke

  1. Slice off the tender edge part of the mushroom into 1/2 inch thick slices.
  2. Marinate sliced mushrooms 2 nights in refrigerator.
  3. Arrange pieces on cookie racks and place over cookie sheets to catch drips then bake in 350 degrees F oven for 30 minutes, strips should still be tender.
  4. Cool and then brush w/vegan Worcestershire sauce or barbecue sauce and sprinkle with black pepper to taste.
  5. Place on dehydrator racks and dry for 12-24 hours, but don’t over-dry–leave a bit chewy.

Best Recipe for Large Morels

It seems a shame to cut up the large specimens that are sometimes found in great abundance around dead or dying elms. If Lady Luck has blessed you with such a find, try this easy recipe for stuffed Morels.
Morels Stuffed with Cheese
1/4 cup panko or other dry bread crumbs
1/4 cup grated Munster cheese
1/4 teaspoon basil
12 large morels: Prepare these with a quick soak in boiling water to which a handful of salt has been added. Drain and pat gently dry. Slit one side to insert cheese filling.
Place morels in a shallow browning pan slit side up, and brush with butter.
Broil for 5 minutes or until the mushrooms brown and the cheese melts.
Now go out and enjoy the hunt!
-From Shirley McClelland

Musings on cooking for the mycophagist

For the mycophagists among us… just wanted to share my new favorite method of preparing mushrooms – roasted!  It’s incredibly easy and can be used as the basis for side dishes or even the main part of a vegetarian meal.  This method can be used with either whole or sliced mushrooms, but using whole or large chunks really looks beautiful, and the end result is that you have a big meaty chunk of mushroom that is crispy on the edges and tender in the middle.  Most fleshy mushrooms are suitable for this.  My favorites are maitake, oyster, and shitake, but even store bought cremini or white buttons work very well.  You can even use dried and rehydrated mushrooms so you can enjoy this with your stash from the fall.

The basic recipe is to preheat the oven to between 400 and 450 degrees, and I like to also preheat the pan at the same time.  Use a large rimmed baking pan such as a jellyroll style pan or large cast iron skillet.  Cut the mushrooms to desired size or leave whole.  Mix about 1.5 lbs of mushrooms with ¼ cup of olive oil or clarified butter in a bowl, and season to taste with salt and pepper.  Take heated pan out of the oven, dump in the mixture, arrange pieces is a single layer, and pop back into the oven. Total roasting time is 20-30 minutes depending on the size of the chunks.  Stir or flip the mushrooms about half way through cooking to get both sides crispy.  If the mushrooms are giving off a lot of liquid, you can pour off the excess and return the pan to the oven to finish.  Save the cooking liquid for another use, it’s really flavorful.

Seasoning variation are endless.  Thyme and rosemary are my favorite herbs to add to the mushrooms as they roast.  Chives and parsley are best if sprinkled on top after cooking.  If you want to use garlic, either use whole peeled cloves from the beginning, or add chopped garlic at the half way point so the pieces don’t get burned and bitter. Smoked salt adds another layer of dimension to the dish.  Serve as is, or even top with sour cream or a fried egg.

True to my promise form the fall foray, I would like to share with everyone the recipe for Phyllis Grimm’s “The Old Woodsman’s Oyster Mushroom and Onion Soup.”  This is a mushroomy version of French onion soup, and is a special treat if topped with a slice of toasted French bread and cheese, then browned under the broiler.

The Old Woodsman’s Oyster Mushroom and Onion Soup

  • 3 onions sliced and halved.
  • 4 T butter or margarine
  • 4 cups beef consume or well-seasoned vegetable broth
  • 1 tsp Worcestershire sauce
  • 2 cups dried oyster or maitake mushrooms (or others)

Melt butter in a stock pot.  Add onions and cook on medium for 30 minutes or until they are tender and starting to caramelize.  Stir occasionally.  Add mushrooms, broth, and Worcestershire sauce.  Bring to a boil, then reduce heat.  Cover and simmer for 30 minutes making sure mushrooms are completely tender.

Makes about 6 one cup servings.

There you have it. This is extremely adaptable, and can be up scaled for a crowd. Using a really flavorful broth or stock is key.   At the foray, I used the fresh maitake Walt had given me a few days before, and roasted it as described above before adding to the soup.

Hope these ideas help keep you warm until summer.

-Sharon Greenberg

Mushroom Risotto Recipe

Yield 6 servings
Active Time 20 minutes
Total Time 50 minutes
Ingredients
5 cups chicken or vegetable broth, divided
1 cup warm water
3 tablespoons olive oil, divided
1 pound portobello mushrooms, thinly sliced
1 pound white button mushrooms, thinly sliced
1/2 ounce dried Porcini
2 shallots, diced
1 1/2 cups Arborio rice
1/2 cup dry white wine
sea salt to taste
freshly ground black pepper to taste
3 tablespoons finely chopped chives
4 tablespoons butter
1/3 cup freshly grated Parmesan cheese

risotto_ingredients

Instructions
Bring Porcini and 1 cup water to boil in a saucepan. Simmer for 5 minutes and transfer Porcini with a slotted spoon to a cutting board.
Add broth to the Porcini liquid in sauce pan and just bring to a boil. Lower heat to simmer and keep warm.
Chop porcini mushrooms. Warm 2 tablespoons olive oil in deep large skillet on medium heat. Stir in Portobello and button mushrooms and cook until soft (3 minutes). Add Porcini and cook 2 minutes. Remove mushrooms and liquid and set aside.

risotto_saute_mushrooms

Add 1 tablespoon olive oil to skillet and add the shallots. Cook for 1 minute and add the rice. Stir rice for 2 minutes to coat with oil.

risotto_rice

When the rice turns a pale golden color pour in the wine and stir continuously until the rice absorbs the wine. Add 1/2 cup of broth and stir until the broth is absorbed. Repeat with remaining broth until all of the broth is absorbed and the rice is neither crunchy nor too soft (al dente), about 15 minutes.

risotto_add_broth

Remove from heat. Stir in mushrooms with liquid, butter, chives and cheese. Season to taste with salt and pepper. Enjoy!

risotto_done

Marita’s Hericium Fried Rice

By Marita King

ingredients:
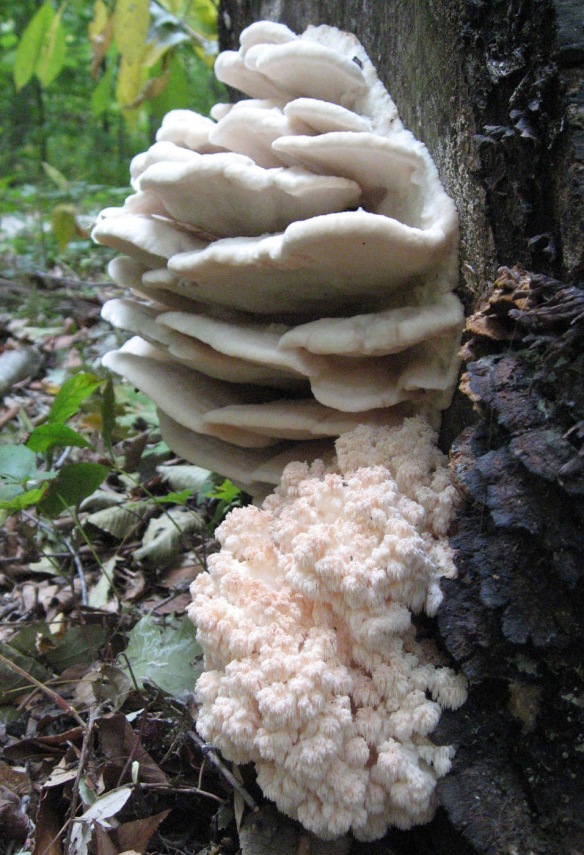
1 Hericium of your choice ( H. coralloides, H. erinaceus or H. americanum)
1-2 Tbsp butter
1/2 small onion chopped
1-2 cups of cooked brown rice
pepper and salt to taste

Find Hericium species of choice (H. coralloides shown below)
Hericium coralloides - Marita 1

Rinse and chop the mushroom. Hericium coralloides - Marita 2

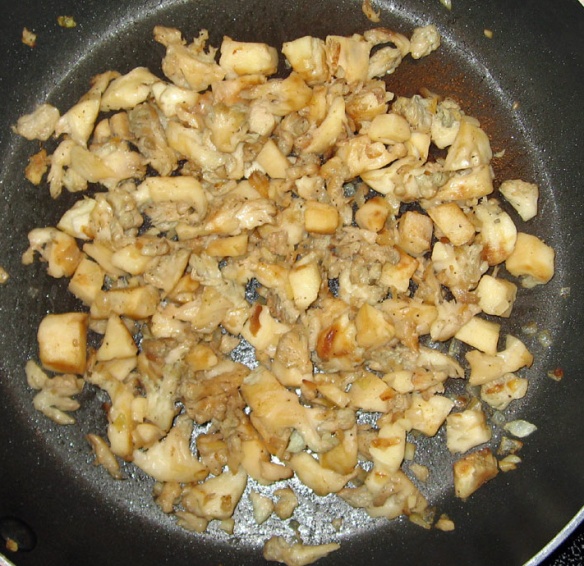
Saute chopped onion in butter, add mushroom and cook until lightly browned.  Hericium coralloides - Marita 3 Hericium coralloides - Marita 4

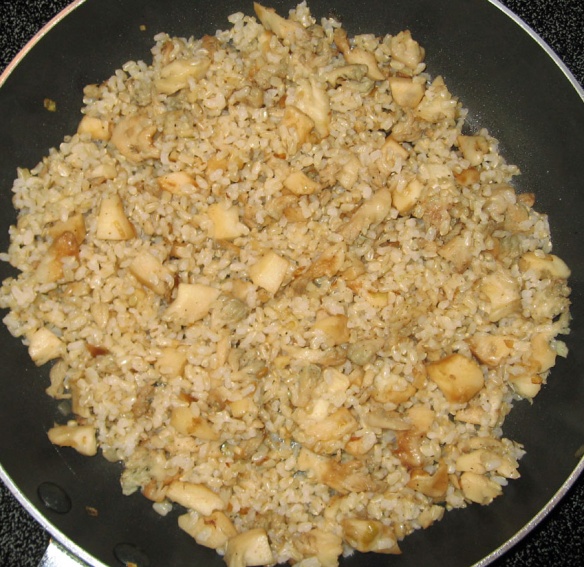
Season mixture, add boiled or steamed rice, fry a couple of minutes and serve!
Hericium coralloides - Marita 5

Marita’s Mushroom Quiche

Marita's Mushroom QuicheBy Marita King

I make this quiche without a pie crust but that’s just for saving extra calories.  I use any mushrooms, herbs, and cheeses that are handy at the time; the low-fat cottage cheese is optional for calorie savers and can be replaced with regular cheese.  Addition of bacon and/or lightly steamed vegetables adds variety.

Mushroom Medley:  Start with 1 Tbsp butter and 1 Tbsp of olive oil, saute ½ chopped onion, add chopped fresh garlic to taste and at least one pound of mushrooms cut into small pieces.  Cook the mix until the mushrooms have exuded most of their liquid.  Add 2 Tbsp Marsala (optional), 1 Tbsp balsamic vinegar, 2 Tbsp soy sauce, and fresh ground pepper to taste.  Simmer and reduce mix to dryness.

Egg/Cheese Mix:   In a big bowl mix 4 eggs, 1 cup shredded cheese, ½ cup low-fat cottage cheese, ¼ tsp salt, ¼ tsp pepper, fresh chopped chives and parsley.

Combine mushroom medley and egg mix, pour into a pie dish, bake 30-35 min at 375F.  Let cool at least 15 min before serving.